In summer 2014, I acquired the remains of one light-duty utility trailer from my father, with the intention to clean it up and restore it, and modify it as needed to be a small boat trailer. I want to be able to carry one kayak, canoe, or small sailboat, along with gear. I decided I would also document this project in HTML and JPEG, hence this website.
Phase 2: Brush it Clean
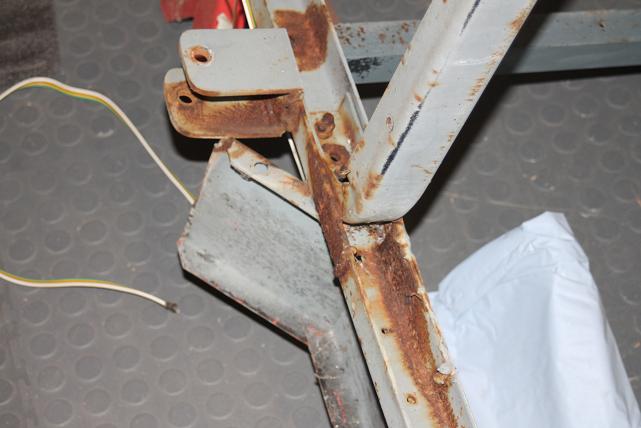
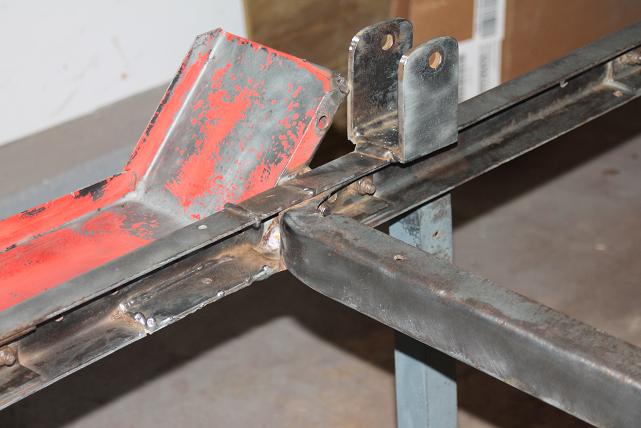
Everything is taken apart, so now it is time to deal with the pine pitch, flaking paint, and patches of rust. In other words, spending a lot of time running a wire brush, either in a drill or by hand, over every part of this trailer. Here's just a small sample of the work ahead:
Week 6: November 22, 2014
I started with the lights. They are mostly plastic, but the nuts that held each to the frame were pretty rusty, so I gave them a WD-40 soak followed by a mineral spirits soak. They each came out ok. One of the lights had a big wad of pitch on it. I found I could wipe it off with just rubbing alcohol. Each light is clean, put back together, and set aside for phase 4, I guess.
As for the wire brushing, I am starting mostly with the axle. It is the most in need and has the most nooks and crannies to have to work the wire brush around in. I find that I can work about an hour at a time, then my wrists and elbows get fatigued from countering the torque of the drill, and the battery starts to slow down. So a little bit a time, I'll get this thing pretty and ready to re-paint.
Week 7: November 29, 2014
The new tongue peice came back. I won't mention the name of the outfit that did this work, since I am rather dissappointed in what I got. On the one hand, they've done me a huge favor, charging me only a quarter of what they could have, but at the same time they did not follow directions or think through what they did.
I started with a bar with a U-shaped cross-section, 2.5 inches by 1.5 inches, 4 foot long, with a 3⁄16" wall thickness. Along this bar were a handful of holes for attaching the coupler, the safety chains, and the rest of the trailer. I have back a bar with a rectangular cross-section (I'm ok with this), 2.5 inches square (not ok), and a full 1⁄4" wall thickness (also not ok).
I had help when I picked this up to tie it atop my Jeep. At home, after very, very carefully bringing it down, I became curious about the weight. I brought my bathroom scale out to the garage, and while this new bar was propped off the floor on scrap 2x4s, slid the scale under it, then carefully pulled away the 2x4s. 70 pounds. I then weighed the old one. 13 pounds. To get a 150% increase in length, I had to take a 438% increase in weight! They claimed that it would not have been strong enough otherwise. I am dubious. I looked the frame over back in the basement, took some measurements, and with some back-of-the-napkin calculation, figure that the entire trailer weighed, at the upper end, 130 pounds total. This new tongue will account for over half the total weight of the trailer when it is re-assembled. I'm not sure what I will gain from its "strength," if the rest of the trailer bends becuase of it.
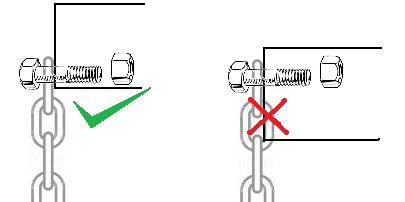
They also screwed up the drilling of the holes. The ones that matter most, the coupler and primary attachment to the frame, they got right. But I asked them to add a second point for attaching to the frame, 19 inches on center from the first one. They drilled it the wrong way (top-to-bottom and not side-to-side). I also asked them to move the hole for the safey chains back an inch or so, and also with the 2.5 inch width, they would have had to lower it to allow room to attach the chain. Well, they put the new holes in the exact same spot (relatively) as the old ones, making them too high and totally useless. I didn't mention this to them, but they should have asked me about it.
Ok, enough bad-mouthing anonymous metal fabricators. I'm getting to work drilling the new holes I need, and since I have my coupler back I am working it over with the wire brushes also. When these are done, I'm going to go ahead and give them a quick coat of primer and set them aside in the garage.
Week 8: December 6, 2014
I've spent my evenings so far this week working to make a slot on the bottom side of the new tongue between the newly drilled holes for the safety chains. This will be where the electrical wiring will exit (so it isn't directly under the coupler.) I also want to use two separate bolts for each chain, and not have one bolt going all the way through both- so this slot will also be where I can insert a wrench. Unfortunately, the steel is tougher than all of my tools, so I work it over with the Dremel with a cut-off wheel until in gets too hot, then with my recip saw until the battery dies. This takes about 20-30 minutes total, then I put them back on the charger until the next day.
I finally got the slot completed on Saturday, and filed the edges smooth. I'll still wrap something around the wires at this point to prevent chaffing along this edge, when the time comes to re-wire it.
I have primed several of the smaller parts, including the coupler and a handful of larger bits of miscellaneous hardware. I got the tongue cleaned up and put a coat of primer on it as well. I had hoped to get the axle all the way to priming also, but it is still spewing clouds of dust whenever the wire brush hits it, so I'll need a bit more time with that.
Week 9: December 13, 2014
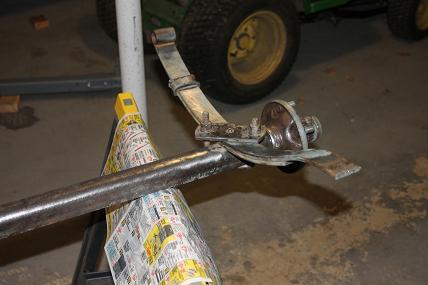
During this week, I kept focus on the axle, and completed wire-brushing it and cleaing it off with some mineral spirits. I finally got a coat of primer on it. The photo shows it as clean as I can get it, just before priming.
I've drilled another hole through the tongue to put a big eye bolt through, about 27 inches back from the coupler. I've measured this out to give clearance from my tailgate when fully open. This will be the point where the bows of boats will be tied down, and mark how far forward a boat can be and still allow the tailgate to swing.
Weeks 10 - 18: December 13, 2014 to February 7, 2015
I am relaxing and enjoying the holidays as much as I can. I still go downstairs for about a half hour every couple of days, rig myself up with dust mask and leather gloves, grab a drill with wire brush, and work over some patch of the frame. I am content just taking it a little at a time. It has also become too cold to work in the garage, so my progress is right where it needs to be, probably until March.
Week 19: February 14, 2015
I continue to wire brush the frame a little bit every few days, with no real hurry. However, this weekend I was far enough along that I decided to switch my perspective on the work area. Or more accuratelty, its perspective to me. Which is all just a fancy way of saying that I took it from leaning up on its edge to sitting horizontally, up-side-down, on the shop floor. This is actually giving me easier access to more nooks and crannies, although meaning I need to bend down more to work. It's all good.
I've worn out a couple of my rotary wire brushes and had to replace them. I've also all but destroyed my VPX drill-driver. The battery won't even take a charge anymore, and the quick-change chuck was feeling loosey-goosey. Well, not even Black & Decker liked the things, they were only sold for less than a year. I guess that says something about it.
Weeks 20-25: Feb 21 to Mar 28 2015
Some other lifeevents have intervened, but more-or-less I continue to simply wire brush away. A little at a time, slowly but surely, with leather gloves and dust mask, it is getting cleaner. I consider myself to be behind schedule at this point, and if the thing is not 100% clean and out of the basement by the end of next weekend, I will be somewhat dissappointed in myself.
My motivation has increased in that I now have my newest toy, a Hobie Mirage Revolution 13 with sailing options. I need to get this thing to the water, soon, and need a good way to get it there. For now, I have another trailer borrowed from some Scouts. I'm sure they will want it back before too long.
Week 26: Apr 4, 2015
Spring is springing. It is consistently warm again, enough to work outside. During the week, I've taken a jump start on the painting phase and put two coats of black on the axle, and two of red on the tongue.
But the main frame remains in my basement, still not clean. Through the weekend, I've almost done a wire-brushing marathon and made a lot of progress on the parts that have internal curves. I've done enough to flip it back upright. In the coming week, I should be able to work those final upper surfaces, and be ready to paint.
Week 27: Apr 11, 2015
During this week, I finally completed the wire-brushing of the frame. I just need to wipe it down a few times with mineral spirits to remove the ground-in metal fragments as much as possible, then it comes out of the basement. I'm working as fast as I can.
In between I have continued to paint the axle and tongue and some of the nuts, bolts, and assorted small parts that need it.
Mid-Week Update!
It's out of my basement!!!! At long last, with the wire brush work done and three wipe-downs with mineral spirits, it was ready to take back to the garage. Although my rags were still coming away brown-black after the third wipe-down, I figure there is a limit to how clean I can get it. Clean enough to start painting. The enemy of good is perfect.
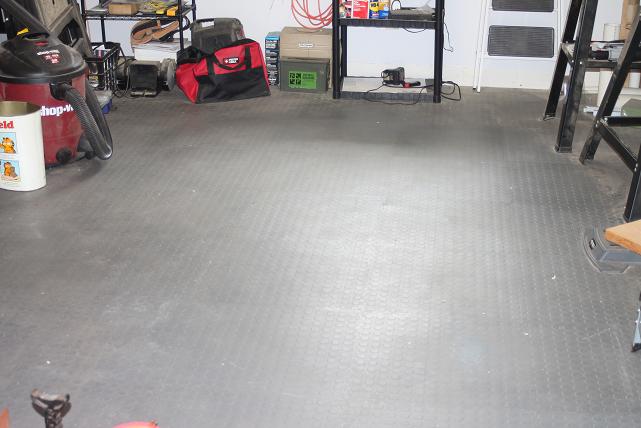
Here are some "after" photos to match some earlier "before" photos in this log. One shows my now-empty basement, which has never looked like this, since everything else had to be moved to the corners during this project. The other shows about the same perspective as the "work ahead" photo above, just rotated. No pine pitch, no old flaky paint, maybe a little rust still, but no longer the crumbly mess it was.
That also means an end to Phase 2, so see you in Phase 3.
 The Trailer Project