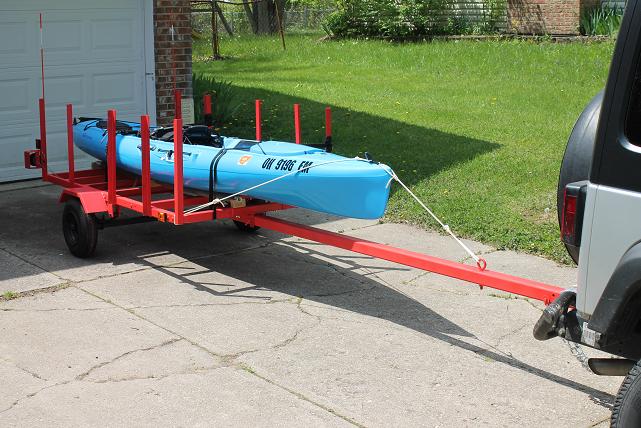
In summer 2014, I acquired the remains of one light-duty utility trailer from my father, with the intention to clean it up and restore it, and modify it as needed to be a small boat trailer. I want to be able to carry one kayak, canoe, or small sailboat, along with gear. I decided I would also document this project in HTML and JPEG, hence this website.
Phase 3: Prime it, Paint it, Put it back together
It is clean. As clean as it is going to get. It is also in three large peices and several bins full of nuts and bolts. Time to make it shine all pretty like, and ultimately make it be a trailer again.
Week 28: April 18, 2015
The frame sits in my garage, upside-down and backwards, with two large cardboard sheets underneath. First step, a thin coat of primer. The trick is to get the primer into every nook and cranny I can find.
Week 29: April 25, 2015
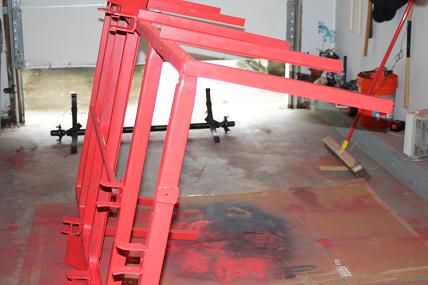
The primer went on very nice, and I let it stand for a couple of days to dry thoroughly. Now the painting has begun. This photo shows it sitting up on its side, with about a coat-and-a-half of paint. In the background, you see the axle and leaf springs, painted black.

The black color covered very well in just two coats, though I went for a third anyway. This red is not covering as well. Between the tongue and frame I've already gone through five cans, and I still see hints of the bare color through the red paint. I think I am just going to be content with it, whatever it looks like after can #6. By the way, this is a color that Rust-O-Leum calls "poppy red."
In addition, I drilled holes in the rear stakes and the corners of the base for two long orange poles (normally used as driveway markers). These will stick up from the back to make it easier for the driver to see in the rearview mirror, and hopefully also act as a marker for vehicles following.
Week 30: May 2, 2015
This week went fast! On Monday and Tuesday, I had other things going on, and just let the frame sit for the paint to dry and harden thoroughly. From Wednesday after work and on, the tasks passed in a blur. I was going so well I forgot to pause and take pics.
Wednesday, the axle went back on. I left the frame upside-down for this to help me get it aligned correctly. It needed a little "convincing" (read: whacking with a hammer) to get set into its cradles, but the bolts when back in nicely. I then put the wheels and tires back on and flipped it upright. The night ended with a little bit of electrical work.
Thursday evening was all electric. The main wiring group pushed back through its conduits really nice. I bolted all the lights back in place and re-tested continuity to ground. I spliced everything back together, then ran it through the new tongue. Finally, I backed my Jeep up to it and plugged it in. Some bulbs needed to be gently tapped and jiggled, but in the end everything matched headlight, brakes, and turn signals like it was supposed to (almost like I knew what I doing).
I completed Thursday by bolting the tongue in place, only to discover that when I drilled the holes that the supplier got wrong (see phase 1) I missed being on center by less than half the width of the hole. So I had to spend several minutes with a drill and a Dremel file widening the hole to get the final bolt in. But it did work out in the end. Likewise, I found that the old coupler would no longer secure down over a ball, and even when down with a lock through the hole, could still be opened. So I invested in a new coupler. Basically, everything at the vehicle end is now all new: coupler, tongue, chains, and wiring plug.
At this point, we can call it a trailer again. So the excitement continues in phase 4!

 The Trailer Project